Showing posts with label DIY. Show all posts

Monday, 28 July 2025

Dewey Decimal Star Stickers DIY


When I was a kid, I took a babysitting course. At the end of the course, we had to do a quiz and the instructor then marked it and put reward stickers on it. One of the stickers was a custom sticker that said "Mrs. [last name] thinks you're a star!" (name omitted to maintain privacy) and it had a cute picture of a star on it. I really like stickers so I have never forgotten that sticker. Recently, as a library cataloguing technician, I was inspired to make a variation of that sticker with a library twist! 523.8 is the Dewey Decimal number for star so I made stickers that say "Cataloguer Kaylie thinks you're a 523.8!" and added a cute star picture. My coworkers thought they were adorable so I made the same stickers for them with their own job titles and names. Funny how one can be inspired by something as little as a sticker that was received years ago!


Cheers,

Kaylie

Monday, 14 July 2025

Scrabble Tile Word Art DIY


My boyfriend and I are big fans of meaningful gifts. He has given me framed images that he created that are connected to our dating history, like a map showing the place where we first met and an image of the night sky of the day that we started dating, while I have written him a poem that I framed for him. Another gift that I gave him recently was a piece of Scrabble tile word art that I created in a frame. I glued old Scrabble tiles to watercolour paper, spelling out both of our first names and crossing them so they connected via the "i" like in a crossword puzzle. This can be done with any names as long as they have a letter in common. I then glued a heart gem to it as well to add a bit of colour and decor. More decorations could be added but I wanted to keep it simple. I then took the glass out of a frame, because it wouldn't fit the thickness of the tiles, and framed the piece. This is such a cute personalized decoration for couples, families, and friends! You can use names or even words that fit a specific theme and then decorate accordingly. 


Cheers,
Kaylie

Monday, 30 June 2025

Creating Personal Lego Minifigures


My boyfriend LOVES Lego and his love of Lego has rubbed off onto me. The first Christmas present that he gave me (before we started dating) was the Once Upon A Brick Lego set. We met when we were both working as branch assistants at a library so the fact that this Lego set is a book made it even more special! For our 4th dating anniversary, I decided to use the Lego website's Pick a Brick section to purchase specific Lego minifgure pieces to create the two of us in Lego minifigure form! I even added extra little accessories that correspond with things we like. Mine has a teapot because I love tea and a book because our my love of reading and libraries. My boyfriend’s minifigure has a Lego newspaper to signify his love for Lego as well as a laptop because he’s a computer guy. I also included a sword for each of us because why not?

On the left-hand side of the Pick a Brick page, you will find some options to help narrow down your search. Select Minifigure Parts to look at all of the minifigure body part options and select Minifigure Accessories to see all of the options for accessories.

Here are some search terms to narrow down your search:
  • For head: Head
  • For hair: Wig
  • For torso: Upper part
  • For legs: Lower part
  • For the plate for the minifigure to stand on: Plate 3x4 with 4 knobs
  • For accessories: Use simple search terms like book, laptop, sword, plant, shovel, etc.

Cheers,
Kaylie

Monday, 23 June 2025

Dewey Decimal Holiday Stickers DIY


Since I'm a cataloguing technician, one year I decided to have fun with the Dewey decimal system and made a Christmas sign that said "Merry 394.2663!" A few years later, I turned it into a sticker and put it in the Christmas cards that I gave to my library co-workers. This year, I thought "Why not do all of the holidays that there are Dewey decimal numbers for?" and made a sign that could be changed based on the holiday. And then I made stickers. I simply used labels that were the size that I wanted, typed the Dewey decimal holiday greeting, and added a banner that matches the holiday. The Dewey decimal numbers for various holidays can be found below. These can be made from whatever labels you like and you can customize them with different images. These are such fun holiday stickers for library staff and patrons!

New Year: 394.2614
Valentine's Day: 394.2618
Easter: 394.2667
Thanksgiving: 394.2649
Halloween: 394.2646
Christmas: 394.2663

Cheers,
Kaylie

Monday, 16 June 2025

Dewey Decimal Holiday Sign DIY


You know you're a cataloguer when... You make an interchangeable holiday sign using Dewey decimal numbers. To create this sign, I chose a book-themed border and printed it off, leaving the center blank. I then made separate rectangles that included the Dewey decimal holiday greeting along with a corresponding image. Both of these steps can be customized to the images you would like to use. After the rectangles were printed, I laminated the bordered page as well as the holiday greeting rectangles which I trimmed afterwards. I took self-adhesive velcro circles, attaching 2 to the front center of the bordered page and 2 to the back of each rectangle. To make sure the velcro lined up with each rectangle, I placed the velcro circles on the bordered page first, with the adhesive of the rectangle velcro facing up, and pressed the rectangle onto the velcro. When I removed it, the velcro was stuck on it and perfectly lined up. You can find the Dewey decimal numbers for various holidays below.

New Year: 394.2614
Valentine's Day: 394.2618
Easter: 394.2667
Thanksgiving: 394.2649
Halloween: 394.2646
Christmas: 394.2663


Cheers,
Kaylie

Monday, 9 June 2025

Library Book Cart Names


Cat and Log

As a library cataloguing technician, I am part of a Technical Services team that uses a lot of book carts. So, we decided to name them! But we couldn’t just give them any old names! We needed puns! It all started with my two small cataloguing book carts which I named Cat and Log (because CATaLOGue, get it?) and then it grew from there. We have some colourful book carts that are named song titles based on their colour (example: Cherry Pie for the red cart) but I’m just showing the library pun book carts in this post.

The Great Cartsby

Fahrencart 451

The Cart of Venice

The Cartcher in the Rye

The Wonderful Wizard of Cart

For Whom the Cart Rolls

The Old Curiosity Cart

Cart of the Flies


Cheers,
Kaylie

Monday, 2 June 2025

Birth Decade Treat Basket DIY


Last year, my mom turned 60 years old. I wanted to give her a unique gift, especially since she just happened to be born in the 1960s. She loves candy so I decided to put together a basket of treats that first came out in her birth decade! For this project, I researched treats that came out in the 1960s because I didn't want to just restrict this project to candy. Did you know that Pop Tarts came out in the 1960s?! I chose treats based on what still existed and what I could get a hold of. After acquiring the treats that I was going to include, I printed off photos of the original wrappers or old advertisements for each specific treat and taped them onto the treat with the year it came out. This gift can be customized for anyone's birthday. Just do a search for treats that came out during their birth decade. CandyFavorites.com has a great retro candy timeline outlining the history of candy decade by decade from the 1840s to the 2020s.


Cheers,
Kaylie

Tuesday, 27 May 2025

My First Spell Jar


In recent years, I have become more interested in witchy stuff. I really identify with my Finnish side (a quarter of my family is Finnish) so I think that’s where this interest stems from. The Finns have a great connection to nature and it makes total sense when you find out that Finnish Paganism existed before other religions were introduced to Finland. I have looked through plenty of witchy books and am constantly figuring out what practices I connect to the most. A lot of witchcraft is going with your intuition and what feels right for you.


I have seen lots of spell jars and wanted to try making my own but was always nervous to do it for the first time. What if I messed up? I had to remind myself about witchcraft being about what feels right to ourselves. A witchy friend from work had her birthday in October and I wanted to give her a witchy themed gift. What better time to try making a spell jar for the first time? I specifically made a protection spell jar for her and it felt even more special making my first spell jar for a witchy friend.


I sat at my altar (unfinished because I’m still working on it) and cast a circle by visualizing a ball of light coming my heart and growing into a sphere around me. I then lit a white tea light and cleansed a small jar by placing it over top of the flame to put it out and let the smoke swirl inside. I then poured in some sea salt, added herbs and plants (I chose ones that are for protection so I used a bit of cedar bough, a piece of oak leaf, rosemary, and thyme all of which came from my family’s land), added a piece of quartz (also for protection and came from my family’s land), and wrote PROTECTION on a piece of paper which I rolled up and placed inside. I then put the cork on the jar and lit a long white candle which I used to pour melted wax on top to seal the jar. Then I closed the circle by visualizing the ball of light growing smaller and coming back to my heart.


Of course, this was only my first spell jar and I’m still learning but I definitely figured out some things that worked for me and some that didn’t work. I really learned to trust my intuition with this first spell jar.


Cheers,

Kaylie

Wednesday, 19 July 2017

DIY Wire Gem/Bead Tree


When I've gone to the Sudbury Gem & Mineral Show in the past, I've always noticed some booths selling pretty wire trees with gems as the leaves. There were all sorts of different colours since different gems were used. They looked so complex that I thought it would take a lot of work but, earlier this year, I decided to see if there were directions online. I bought some beading wire and gemstone beads at a craft store and tried it out. I wanted to make a small tree just to learn how to make them and it was easier to make than I thought! I gave my first tree to my Dad as a late birthday present. I decided to make another wire gem tree for this DIY post and I even made another tree, a weeping willow, with seed beads! The step-by-step directions are below along with photos and tips. Once you know how to make the wire gem/bead tree, it is easy to switch up some of the steps to make different looking trees. At the end, I give a short description of how to do some of the steps differently to make a weeping willow with seed beads.


Supplies:

  • 24-gauge beading wire
  • Gemstone beads (or regular plastic/glass beads)
  • Ruler
  • Scissors

Notes before starting:

*These instructions are for a small tree. If you want to make a larger tree, increase the amount and length of the pieces of wire.

*Always twist wires in the same direction so that they look nice.

*Trees are perfectly imperfect so make sure to keep this in mind:
  • The twisting does not have to be perfect.
  • Give your branches and roots some variety. Do not make them all the same.
  • Arrange the branches and roots in a natural way so that they go all over the place.

Instructions:


Step 1:


Cut 24 pieces of the beading wire, each measuring around 12 inches.


Step 2:


String a gemstone bead on a piece of wire, bringing the bead to the center of the wire and folding the wire in half. Twist the two halves of the wire together a few times at the base of the bead. 


Repeat for all of the other pieces of wire.


Step 3:


Take two of the beaded wires and join them together by twisting them together at the base of the previous twisting. Add a third one to a few of them. 


Repeat this with the other beaded wires so that you have several small branches.


Step 4:


Take two of the sets and twist them together, just like we did with the single wires in the last step. Add a third one to some of them.


Repeat this with the other sets so that you have at least four large branches.


Step 5:


Twist all of the large branches together at the base of all of the twisting and twist down to create a trunk. Do not twist all of the way.


Make sure that you leave enough wire to create roots in a similar way as creating the branches.


Step 6:


Separate the wires into three groups.


Separate each group into two groups so that you have a total of six groups.


Twist each of the six groups a bit. A few of these groups can be twisted all the way. Others can be separate again into two groups which can be twisted all the way.


Cut off any excess wire.


Step 7:


Bend and arrange the branches and roots in various directions.


To make a weeping willow with seed beads:


Cut 24 pieces of the beading wire, each measuring around 12 inches. Keep each piece of wire straight. Curl one end of each of the wires in a bit to make a sort of loop that will hold the beads on.


String seed beads onto a third of a piece of wire. Do this for each of the other wires. Be careful not to let the beads slip off of the wires. Follow steps 3-7 of the wire gem tree instructions.


They make such pretty decorations and they especially make pretty gifts!

Cheers,
Kaylie

Wednesday, 24 May 2017

Tussie-Mussies


I found out about tussie-mussies when I was browsing the internet learning about uses for herbs and the history of perfume. I guess tussie-mussies are somewhat connected to those searches. I found tussie-mussies to be very interesting, especially when it comes to their history, and I decided to make one for my grandma for her birthday last year. First, let's go over a bit of information about tussie-mussies and how to make them and then I'll talk about the one that I made for my grandma!


Tussie-mussies are small bouquets of flowers, plants, and herbs. The flowers are arranged in the center of the bouquet while the leafy plants are arranged around the outside. The bouquet is then tied together somehow (using elastics works great and then a nice ribbon can be tied around that) and then the bouquet is wrapped in a doily or pretty paper with a hole cut in the center where you place the stem of the bouquet so that the bouquet sort of sits on the doily.


Tussie-mussies were used centuries ago and then became popular again during the Victorian era. During that time, there were certain customs that controlled conversation so people had to figure out a way to speak without physically speaking. Tussie-mussies were perfect because the important part of a tussie-mussie is that each flower, plant, or herb means something. People call this the "language of flowers." People would wear a tussie-mussie to express what they wanted to say or sometimes they would send one to a specific person. For example, maybe they would want to show that they were grieving or maybe they would want to express their love to a certain person. A flower, plant, or herb can have anything from one to several meanings and sometimes the meanings are even contradictory. People would therefore consult special dictionaries that listed the meaning of the flowers, plants, and herbs or they would attach a small card to the tussie-mussie explaining the meanings, especially if the tussie-mussie was being given to someone. I recommend searching for tussie-mussie dictionaries online and finding the ones that you prefer to use. Some are better than others.


Since I was making a tussie-mussie specifically for my grandma's birthday, I wanted to express joy over this occasion (since birthdays are joyous occasions) and I also wanted to express all of my wishes for her on her special day. I also wanted to use flowers, plants, and herbs that were currently available on my family's property and in our garden areas.

I chose the following flowers, plants, and herbs for her tussie-mussie:
Pansy = Merriment
Yarrow = Health
Vervain = Good fortune
Wood Sorrel = Joy
Basil = Best Wishes
Fern = Sincerity

The pansies came from our hanging flower baskets. The yarrow, vervain, wood sorrel, and ferns came from further back on our property (in the bush by a river). The basil came from our vegetable garden.

It is also common to create a phrase using all of the meanings so I created the following phrase:
Sincere wishes for health, joy, and good fortune on this merry occasion.


I used rubber bands to tie all of the stems together and did this several times throughout the bouquet to ensure that the various layers stayed together and didn't fall apart. I cut a piece of paper in a sort of round decorated snowflake style and cut a hole in the center large enough for the stems of the bouquet to fit through. I also tied a nice ribbon around the elastics and the base of the paper to hide the elastics and paper edge as well as to hold everything together nicely. I wrote out the meanings and phrase on a piece of paper along with a little birthday message and tied it to the bouquet. I also placed the bouquet in a small vase of water to make sure that the plants would last. I told my grandma that she could leave the bouquet in the water for a while and when the plants start to wilt, she can try drying the bouquet so that she could keep it. She ended up letting it dry and still has it sitting on her table beside her chair.

Tussie-mussies are not just simple bouquets. They are so much more! I think that's why they make such special gifts. Also, you can adapt them for basically any occasion since there is a large range of meanings associated with the flowers, plants, and herbs. Give it a try!

Cheers,
Kaylie

Friday, 5 February 2016

Gratitude Jar


Last year for Christmas, I put together this little gratitude jar for my family. I had seen the idea on the internet and thought that it was right up our alley. I basically just cleaned out a mason jar, attached some string and a little label that says 'Gratitude Jar,' and filled a little bag with tons of little pieces of colourful paper that I had cut. The whole point of a gratitude jar is to write down the things that you are grateful for on the little pieces of paper and stick them in the jar. At the end of the year, you can empty the jar and look through everything that you or your family was grateful for that year.

In 2015, we used the gratitude jar a little bit but we never filled it up. We kind of forgot about it but I really want to use it this year since I feel like I need it to help remind me of all of the good things in my life.

Cheers,
Kay

Thursday, 30 October 2014

DIY: Personalized Stickers


I wanted Halloween stickers that had music notes or some kind of music theme to give to my piano students. I knew that it probably wouldn't be easy to find some plus I don't need a lot of them so I just decided to make my own. 

I took white sticker labels and divided them into rectangles with a pencil and ruler. I then wrote and drew on each of them with Sharpie markers. You can write and draw whatever you like! You can also use any writing tool (markers, pencil crayons, crayons, pens) although I like how Sharpie markers show up. I decided to write 'Happy Halloween!' and draw music notes and pumpkins. I then cut out each of the stickers. When I want to use the stickers, all I have to do is peel off the back!

This is a super easy way to make personalized stickers for any holiday, occasion, or theme so have fun with it!
-Kaylie

Tuesday, 27 August 2013

DIY: Lips Wall Art


After seeing various lips artworks, including ones where you actually put on lipstick and kiss the paper, I decided to make my own version using watercolour paints.
I first drew all sorts of different lips all over the paper after gathering inspiration from pictures of lips on the internet. I then proceeded to paint them each a different shade of red, pink, or purple. After I finished painting them, I outlined them in black sharpie. I felt that the corners needed something so I glued two strips of squiggly gold ribbon in each corner of the paper. You can frame your wall art or attach it to the wall like a poster.
I'm going to put my lips wall art by my vanity desk! I don't wear lipstick (or any other kind of makeup) but it will just look nice and it goes with the whole vanity desk theme.

-Kaylie

Tuesday, 20 August 2013

DIY: Mini Travel Diary


It's so fun to keep a diary during a trip. Even if you don't have time to write during your trip, you can write down the memories after you return. I thought of making this mini travel diary because it's easy to bring along and toss in your bag or put in your pocket. After taking it along on a recent family trip to a few places in Ontario and Michigan, I have decided to start a new tradition of making one of these mini diaries for each family trip (long trips, not just 1 day trips). These are great because, like photos, they hold the memories of your trip. 

1. To make the pages, take a normal sized piece of paper (like the kind that you use in a printer).

2. Fold it in half.

3. Fold it in half the other way.

4. Fold the two ends of the paper inwards so that you are left with 8 rectangles on your paper.

5. Fold the paper in half and cut down the center line so that when you open it up again, there is a cut slit along the center that only goes along the two center rectangles.

6. Fold along the folds of the paper so that the slit in the paper creates an open diamond shaped hole.

7. Push the two sides of the diamond together to create four rectangles. 

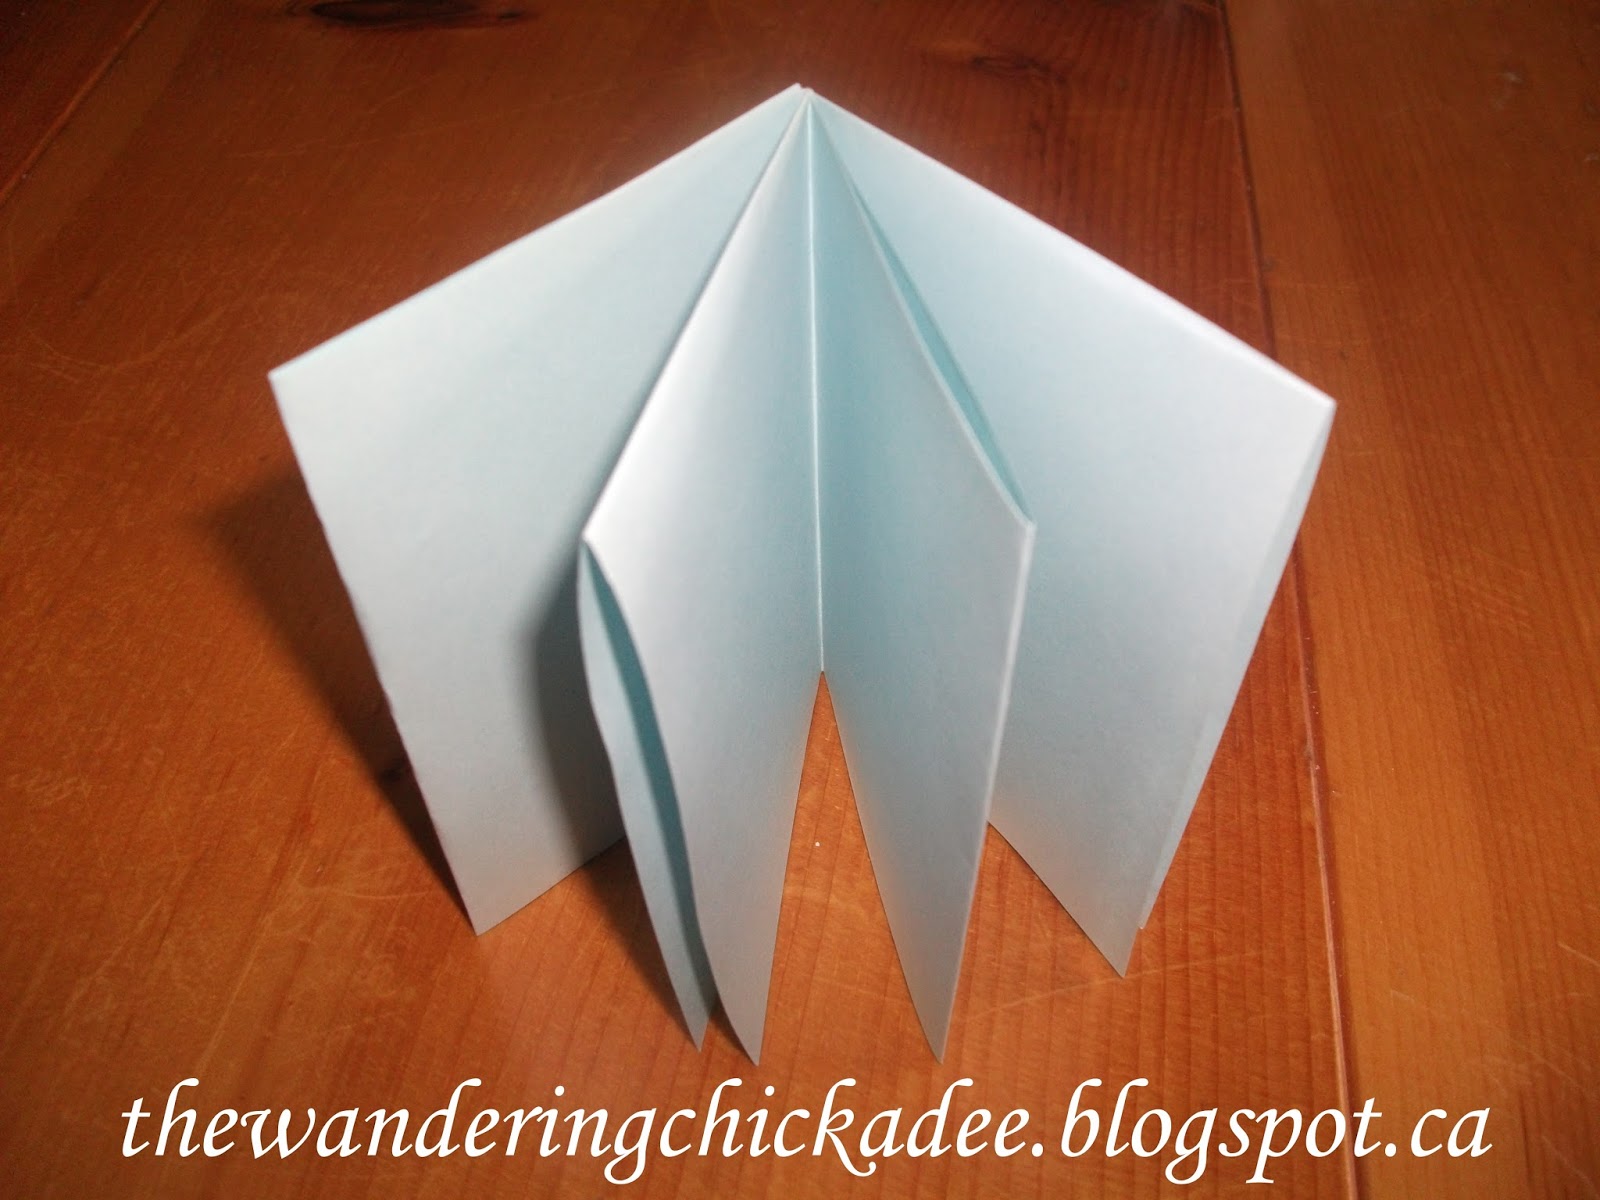
8. Arrange the rectangles into a booklet shape by making them all face in the same direction.

9. To make the cover, take a piece of card stock paper and trace your open booklet of pages on the card stock paper.

10. Cut out your rectangle.

11. Fold the cover in half and insert your booklet of pages.

13. Make sure everything is aligned and open the booklet to the very center. There should be two rectangles on both sides when you open it up to the center. With a needle and thread (choose a colour that works best with the colours of your diary), sew right down the center. Make sure that the tail of the thread on both ends is inside the diary so that it isn't noticeable on the outside. 
In the first image, you can see what the sewing looks like on the inside and in the second image, you can see what the sewing look likes down the spine on the outside.

Your mini travel diary is complete!

You can decorate the outside and inside in any way that you like! You can also use any colours of paper that you like! This diary can fit 8 days so if you like more, follow steps 1-8 to make extra pages and, before you sew the diary together, open both booklets of pages to the very center and lay one booklet on top of the other and then continue through the rest of the steps of sewing. If your trip is less than 8 days, you can put your trip schedule on the first page, reflect on your trip on the last page, etc. Be as creative as you like with this project!


Enjoy recording the memories of your trips!
-Kaylie